Bye Bye Macabre Sculpting Creepy Fantasy Art Concept Art Core
How to create striking horror art

My process for painting personal piece of work gets a lot of scrutiny. "How exercise you lot brand information technology not look like a digital painting?", "How do you attain those textured ghostly effects?" I always attempt very difficult to make my images look like they weren't created digitally, or at least brand them transcend the medium in which they're created.
Digital painting often has a tendency to look flat, synthetic and lifeless. I always put an emphasis on making my characters and textures look rich and full of raw, chaotic energy.
It may be a cliché, but I feel that happy accidents are one of the main driving factors in my work, and since I'k using a digital medium, the power to experiment is about infinite (which tin can, however, be a problem in its own way).
Watch the full tutorial
Throughout the course of this workshop at that place will be many points where things don't go as planned or have an unexpected turn. Notwithstanding, since this was done for a magazine cover with very specific goals and guidelines, I may non be able to play around with the image as much equally I normally would.
The tools I use to pigment this image are pretty straightforward. I never deviate from the bones Photoshop Difficult Round brush for rendering, and the textures I utilise are generated from a few photos of my acrylic paint palette. Most of the experimentation comes simply from altering the colours and playing with the diverse layer settings.
01. Sketching and planning
I put downwardly the basic limerick of the epitome, trying not to get into any irrelevant details, considering I know that the focus will most probably be on the adult female'due south face. I'll endeavor to brand certain the rest of the image supports and doesn't distract from her expression and gaze .
02. Colour considerations
At this point I'm not actually thinking about colour – I know that I'll play effectually with information technology for the entire duration of the creation process. The more plans I lay out for myself at the beginning, the less enjoyment I'll get out of the prototype and the less interesting it will expect. This is probably pretty terrible communication for illustrators, but it's how I like to work
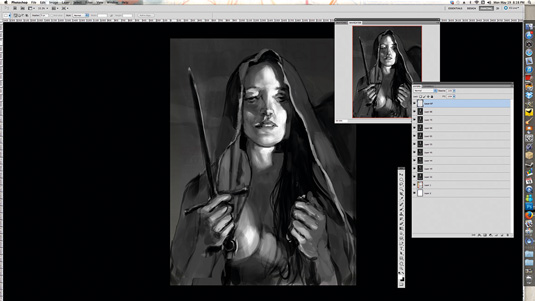
03. Begin rendering
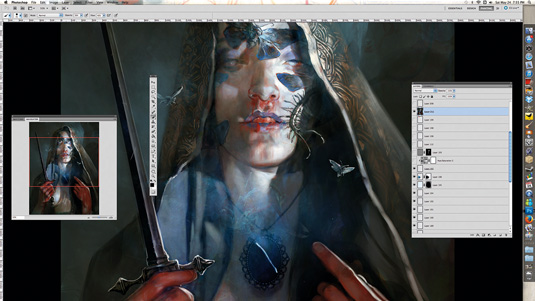
I brainstorm rendering the confront. The colours are fairly arbitrary – they'll change many times before I'chiliad finished. Sometimes I do all my rendering in greyscale earlier adding colour, only that's pretty dull.
Edifice up colours gradually generates more depth and gives the paradigm more life. I was going to have a lot of insects crawling from her rima oris, merely abandon this for clarity.
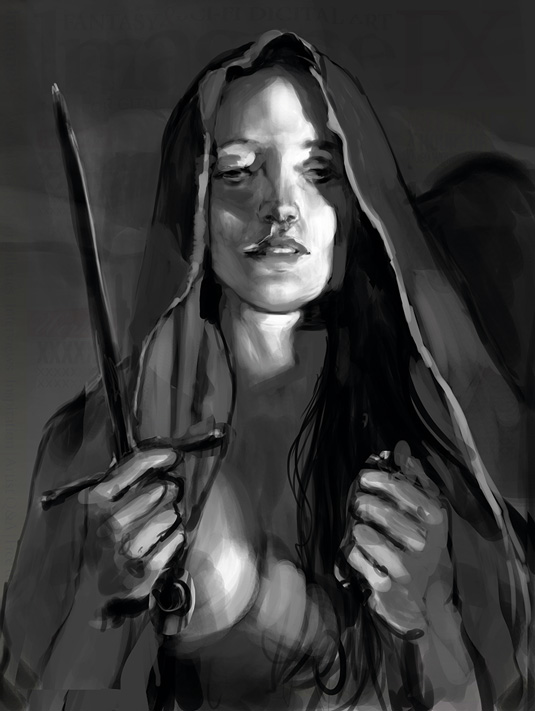
04. Adding facial details
I brainstorm to add more details – in retrospect, probably too early on – to textile and face. A colour scheme that I like is beginning to emerge. Afterwards some experimentation with the layer styles I run across a night blue/metal type of effect I like and stick with it for the moths.
Somehow I managed to finish up with over 200 layers by this point. I never claimed to be very organised!
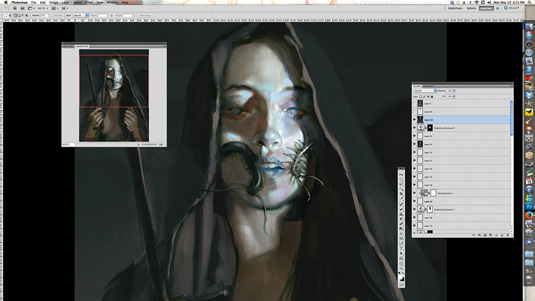
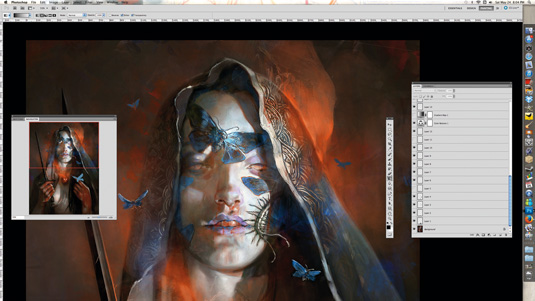
05. Calculation effects
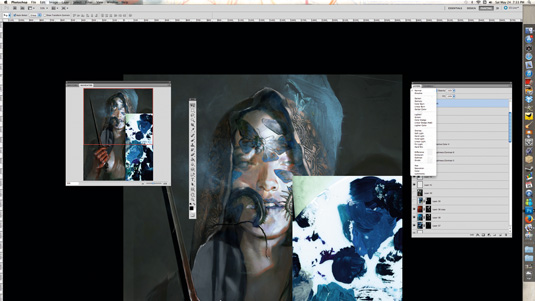
I start adding effects. I use two or iii scans of my acrylic paint palette – their random colours and textures are really proficient for experimentation.
I overlay them on the epitome and play with the layer modes until I see something I like, then paint over the top. Multiply, Overlay, Saturation and Subtract are my favourites, but you never know what will create something interesting.
06. There will be blood
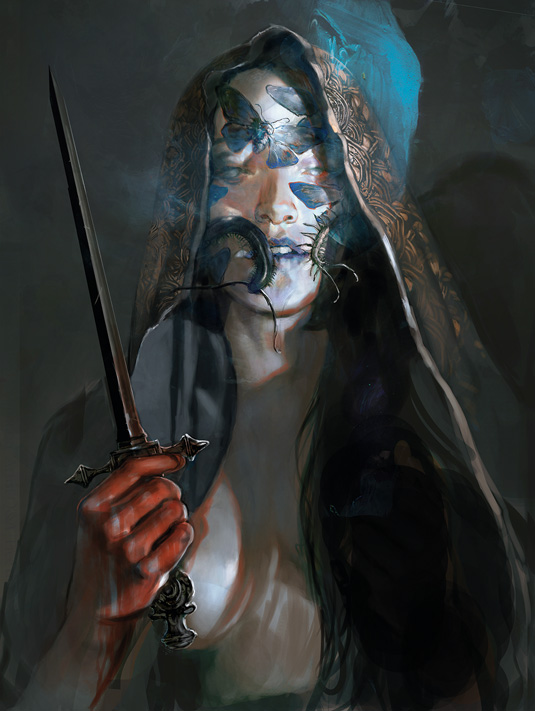
After rendering, I add the blood by painting over the hand with red and setting the layer mode to Multiply. I then add together the rim lights on height, besides as some specular highlights to get in look glossy and suggest that information technology's drenched in claret.
07. Sword play
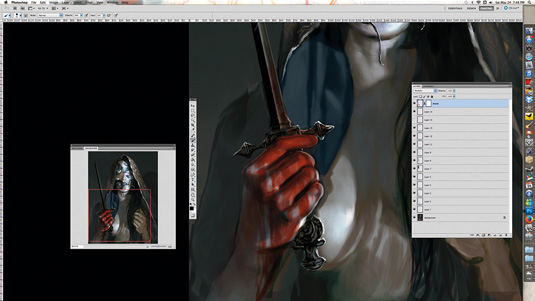
I try to proceed the sword's blueprint ambiguous and not too distracting, because I still desire the attention to be on her face up. I'll commonly paint the weapon vertically and then rotate it into position to go along things looking straight.
08. Calculation details
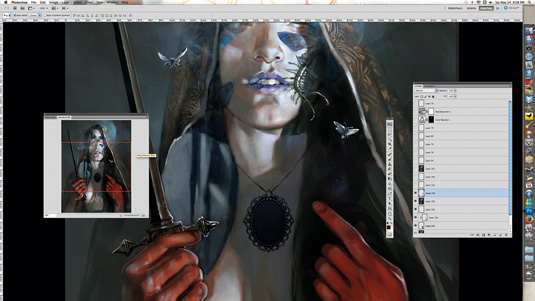
I add a necklace, planning to have information technology emanate some sort of magical/ghostly mist. I go along information technology dark so that the effects will bear witness up on tiptop, using the same paint texture-overlay technique as earlier.
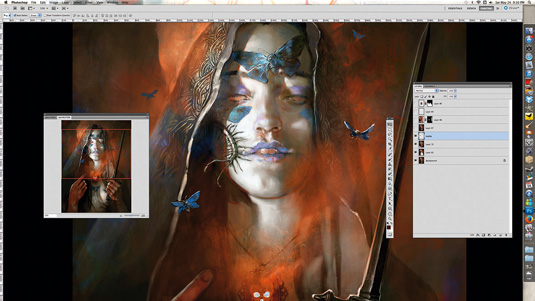
I edit the face up, readjusting the moths and insects so that she's more than readable at a distance. I now have enough elements for me to feel comfortable developing a color scheme.
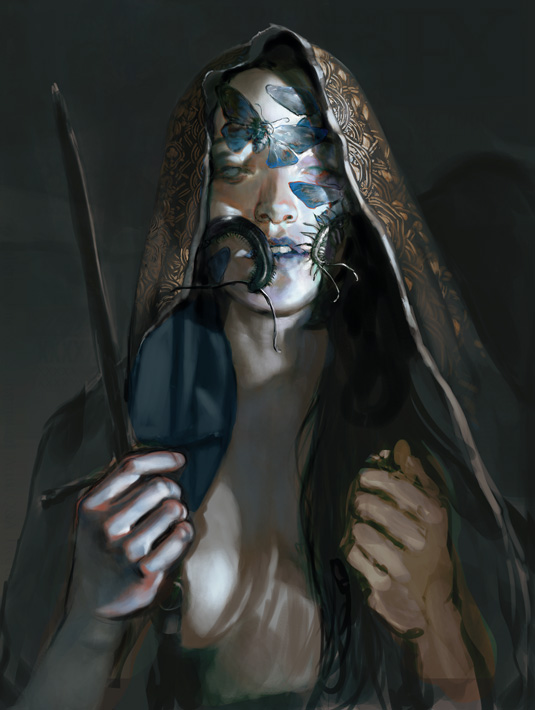
09. Establishing a color scheme
I decide to use an orange-reddish to highlight elements I want to stand up out (the lips, eyes, easily) and proceed the rest of the image more often than not common cold and blueish. I'grand still exploring ways to have the mist emanate from the necklace, and play with the idea that it's been slashed with her dagger.
However, the cold blue hues are making the image experience a bit as well flat and uninteresting.
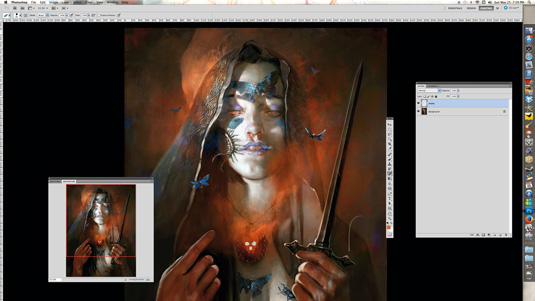
10. Color adjusting
I select the areas around her and hue-adjust them into a warmer, peppery colour. This adds better atmosphere and energy, and makes her feel like she's role of a scene. I use Image>Adjustments>Colour Residue to unify my colours and give more warmth to the scene. I might as well use gradient maps or Selective Colour in the same menu to help pop out the reddish highlights.
eleven. Flipping out
I flip the image for compositional reasons. After flipping I notice a lot of flaws in the proportions or elements that merely bug me. Ideally, y'all desire to be flipping your epitome every bit much as possible, something I find myself forgetting to do quite often.
I refine the face and add together effects to assist the character stand up out even more, such as lightening the pare and adjusting her hood.
12. Final laissez passer
I continue to adjust the confront, trying to bring back elements I liked from previous iterations that got lost, like the purple on her eyelids and nose.
I apply either a High Pass layer or Unsharp Mask on a new flattened layer to boost the details and texture in certain areas. I add more insects to the lesser of the image and readjust the moths on her face and then her eyebrows come through.
Words: Jeff Simpson
Jeff is a concept creative person and illustrator who works at Eidos Montreal. His clients include Ubisoft Montreal, Universal Pictures, Lionsgate, MPC, The Mill and Wizards of the Coast. This article originally appeared in ImagineFX magazine issue 111.
Similar this? Read these...
- The Labyrinth and Dark Crystal illustrator exclusive interview
- How to create great fantasy art every fourth dimension
- These dark doll paintings are the stuff of nightmares
Related articles
carpenterupecent47.blogspot.com
Source: https://www.creativebloq.com/digital-art/how-create-striking-horror-art-101517422
0 Response to "Bye Bye Macabre Sculpting Creepy Fantasy Art Concept Art Core"
Post a Comment